As a on and off buyer of Crafts Beautiful Magazine over the past 2-3 years, I thought I'd write up an honest magazine review. Crafts Beautiful in my opinion is visually enticing with their free gifts galore but don't be deceived by the gifts as this may not be the magazine for you. As you are aware when you think of Crafts it generally covers every spectrum from sewing, paper craft, jewelry making and much more. This month I bought August edition, enticed by the decoupage kit and the envelope folder! How could I not, I am a woman of crafty needs! I love and inspire to dabble in all crafts, however, time does not allow me to, so as always I added the nice free gifts to my pile of "one day I will get time to paper craft". As many of you know as a little fabric shop owner, I do however, make time for Sewing, by teaching people all kinds of sewing notions, so magazines are very important and a valuable learning tool.
I personally think Crafts Beautiful is an excellent magazine for enthusiasts of paper craft, however, the tutorials on anything else in the magazine are few and far between. This magazine is predominantly card making/quiling and any other crafty wonders you can accomplish using paper or card, however, for me paper-craft really lacks a lot in terms of offering mixed quality crafts. I just cannot help but think that if Crafts beautiful wanted to be a paper making magazine, why didn't it do just that in the beginning, rather than portraying to many of us that it's a multi-craft magazine. I understand that there are always a few tutorials for Jewelery Making, Sewing Projects but they are on a number that is in no way equal to that of the paper projects. As a result Crafts Beautiful are missing a large target audience looking for new and unique projects that just haven't been done before and in my opinion Crafts Beautiful in a way are recycling the same material week in week out. Magazines can accomplish the balance of multi crafts, take Simply Homemade as an example. For me it's really balanced in terms of projects, it doesn't allow one craft to dominate another and whilst a magazine always has to be different from others, a Magazine should do what it says on the tin! If you are a paper enthusiast, Crafts Beautiful is for you, if you are a crafter of any other sort, find something more specific to you and if you want a decent multi magazine, try Simply Homemade and see if you can establish what makes a good magazine. I've emailed the Editor with the issues raised in this review, look forward to her response and maybe I will be buying Crafts Beautiful again in the future when perhaps they diversify abit better. This of course is my opinion, tell me what do you think?
Wednesday 23 July 2014
Monday 26 May 2014
To Florida and Back!!
Well I've been jet setting of to Florida so I haven't updated in a while! Lots happening in my little world including plans to open a bricks and mortar store in Invergordon, so it's all very exciting. Myself and hubby have just gotten back from a fabulous holiday in Florida, and I'm shocked at how brave I was!! I went on everything apart from Summit Plummet!!! So Pretty proud of myself. :)
There was this water ride called Breakway falls!! and basically you stand in a capsule/torpedo tube and it drops you vertically! It's terrifying!! The worst part is the capsule closes with you in it and the heartbeating in the back ground. Plus you watch other people drop and then suddenly the floor opens below you and you feel like your falling to your death! Robby (My big strong 6ft 4 man chickened out :P but then he did do summit plummet, which there was no way on earth I had the nerve to push myself of what felt like a vertical drop. which do you think is scarier?


I even went on this, it's called Sheikra and is at Busch Gardens, fair to say it was actually amazing. Still I screamed like no other!!
_05.JPG)


Hey ho! that was Florida and now it's back to work at Patchwork Paradise headquarters. Lots of love, Jenny xxx
There was this water ride called Breakway falls!! and basically you stand in a capsule/torpedo tube and it drops you vertically! It's terrifying!! The worst part is the capsule closes with you in it and the heartbeating in the back ground. Plus you watch other people drop and then suddenly the floor opens below you and you feel like your falling to your death! Robby (My big strong 6ft 4 man chickened out :P but then he did do summit plummet, which there was no way on earth I had the nerve to push myself of what felt like a vertical drop. which do you think is scarier?
Breakway Falls!
Summit Plummet
I even went on this, it's called Sheikra and is at Busch Gardens, fair to say it was actually amazing. Still I screamed like no other!!
We visited Clear Water beach was lovely :) Myself & Rob are getting pretty good at this Selfy thing!
I thoroughly enjoyed the food in America but who doesn't!!! Dare say I'm sure I put on a pound or two and poor Rob put on a stone! Back to the manual day job will sort him out in no time I'm sure.
. Disney Epcot was lovely, the gardens really are pretty! I even sneaked a cheeky kiss with Flower!!
Hey ho! that was Florida and now it's back to work at Patchwork Paradise headquarters. Lots of love, Jenny xxx
Fabric Scrap Wreath Tutorial - No Sewing Required
This is one of the easiest tutorials and items to make, and yet that doesn't take away from the awesomeness & prettiness of the item. So here's how it's done.
Step 1: First gather your ingredients.
You will need.
A nice pile of fabric scraps.
Pink Shears or Scissors
A Coat Hanger Wire
Pliers
(Embellishments are optional, the hearts you see can be sewn on at the end)

Step 2: Using your pliers hold the coat hangar steady and start twisting your metal into a hoop, it doesn't have to be perfect because it's all going to be covered with fabric.

Step 3: Pull out each scrap strips of fabric your going to use, and you can choose to pink the edges with your scissors before you tie them on your coat hangar, it prevents your fabric from fraying and also makes it look really cute when your finished.

Step 4: Once you have done this start individually knotting your strips of fabric onto your wired coat hanger, try to tie each one with fabric facing towards you, it may need a bit of tweaking and pulling about but you can adjust as much as needed.

Step 5: Keep going, all the way round, bunching your fabric pieces together to create a gathering effect do this the entire way around until there is no more visible coat hanger. It will look something like this as you progress around the outside! When your finished you can choose to tie on some larger accents of fabric like I did using Michael Miller Strawberry Blossoms and I made 4 larger bows to stand out at each corner. The final part is very simple.

Step 5: Basically with the coat hangar head you want to twist all the way round to make a loop, this is closes of your coat hanger head. You then wrap your choice of fabric around the head to make it match in with your decor. This gives you a nice hanging loop. with no visible wire. You can see what it looks like in the picture below, this is without the fabric coiled round it.

Step 6: Final touches is to space all your ribbons fabric scrap out how you'd like them, you can embellish with all sorts of lovelies. I've added 4 larger Strawberry blossom bows and a welcome sign. Giving it a real Scrap book feel. Such an easy way to use your scrap up and the kids can do it to. :)

I hope you enjoyed the tutorial. Plenty more to come. If you've made this item following my tutorial would love to see your pictures. Post them in the comments below. :)
Thank you and happy stitching, love Jenny xx
Sunday 20 April 2014
10 Easy Steps to Fabulous Fabric Flowers - So Simple, even Hubby Can do it! by Jennifer Payne
In this tutorial I am going to teach you how to make ever so simple fabric flowers, let's first gather our ingredients, hubby has followed along with the tutorial to make his very own.

Step 1 - Gather all your ingredients
Scissors
Something Round about 10cm length/width
Scrap/Small Pieces of Left Over Fabric that fit your Round Object Lid
A Needle and Thread
A Pen or Pencil
Pins (Optional)
Button for the center

Step 2: On the Reverse side of your scrap piece of fabric, Draw Around your Round Lid to Mark out your Circle. Cut your Circle Out.


Step 3: Repeat Step 2 until you have a total of 6 round circles. Each one of these will form the petals. I am making the pink ones and Robby (Hubby) is now making the Riley Blake Car ones in the back. He's not the neatest of cutters so I helped him out. :)

Step 4: Take one of your Circles, and fold it in half, then fold it in to a quarter. As pictured below.

Step 5: Holding your quarter of fabric you folded in step 4. Make 3 Stretched, long straight stitches across the raw end of your fabric. Make sure you secure with a small strong knot at the start of your long straight stitches. As Pictured below. Important do not cut your thread, you will need it for your next petal.

Step 6: Pull the fabric tightly together, whilst your thread is still attached, so it looks something like this.

Step 7: Whilst your other fabric is attached repeat steps 4-6 for the next petal. As shown below.

Once you have pulled your fabric tight against the starting knot again it will look like this.

Step 8: Continue steps 4-6 for all 6 petals. When you are finished it will look like this, if it does, then well done. :) Your on the right track. Make sure all your fabric petals are squished tightly and evenly together.

Step 9: With your stray thread, we are now going to use this to secure all your petals in place. You can do this by looping back into the starting petal. Place your needle under one side of the petal and push out through the center and through to the other side of the petal. Try to keep this as close to the bottom as possible, so it's all hidden :) I think the picture below gives you a good idea of what I mean. Repeat this all the way around and once securing the last petal, push the needle through the center of the flower and secure your stitching with an appropriate knot to suit you.

It will look something like this. Very cute, don't you think :) x

Step 10: The next part is really easy, choose your button and sew it through the center of your fabric to finish. Make sure you secure your button. :) Wallaa! your done! Embellish, cushions, hair bows and much more.


Hubby made this one! Proof that anyone can do it! :)

Show me where you have used your fabric flowers by emailing me at patchworkparadise@gmail.com or visiting us on facebook.
Hope you loved the tutorial. Lots more to come, please share and encourage the world to pick up and be a happy sewer.
Happy Stitching and Have a Fabulous Day.
Jennifer xxx
Saturday 19 April 2014
How to make your very own Inside/Out Satchel! Eeek :) by Jennifer Payne
This Tutorial Will Guide you through the complete steps enabling you to make your very own basic inside/out satchel, if you don't understand any of the stages in this tutorial please don't hesitate to ask any questions.
Step 1: Gather Your Ingredients :)
You need approximately 1 Yard of Fabric,
Snippy Scissors,
Dress/Sewing Pins,
A Tape Measure,
Preferably a Sewing Machine but can also be done by hand,
A Pen/Tailors Pencil,
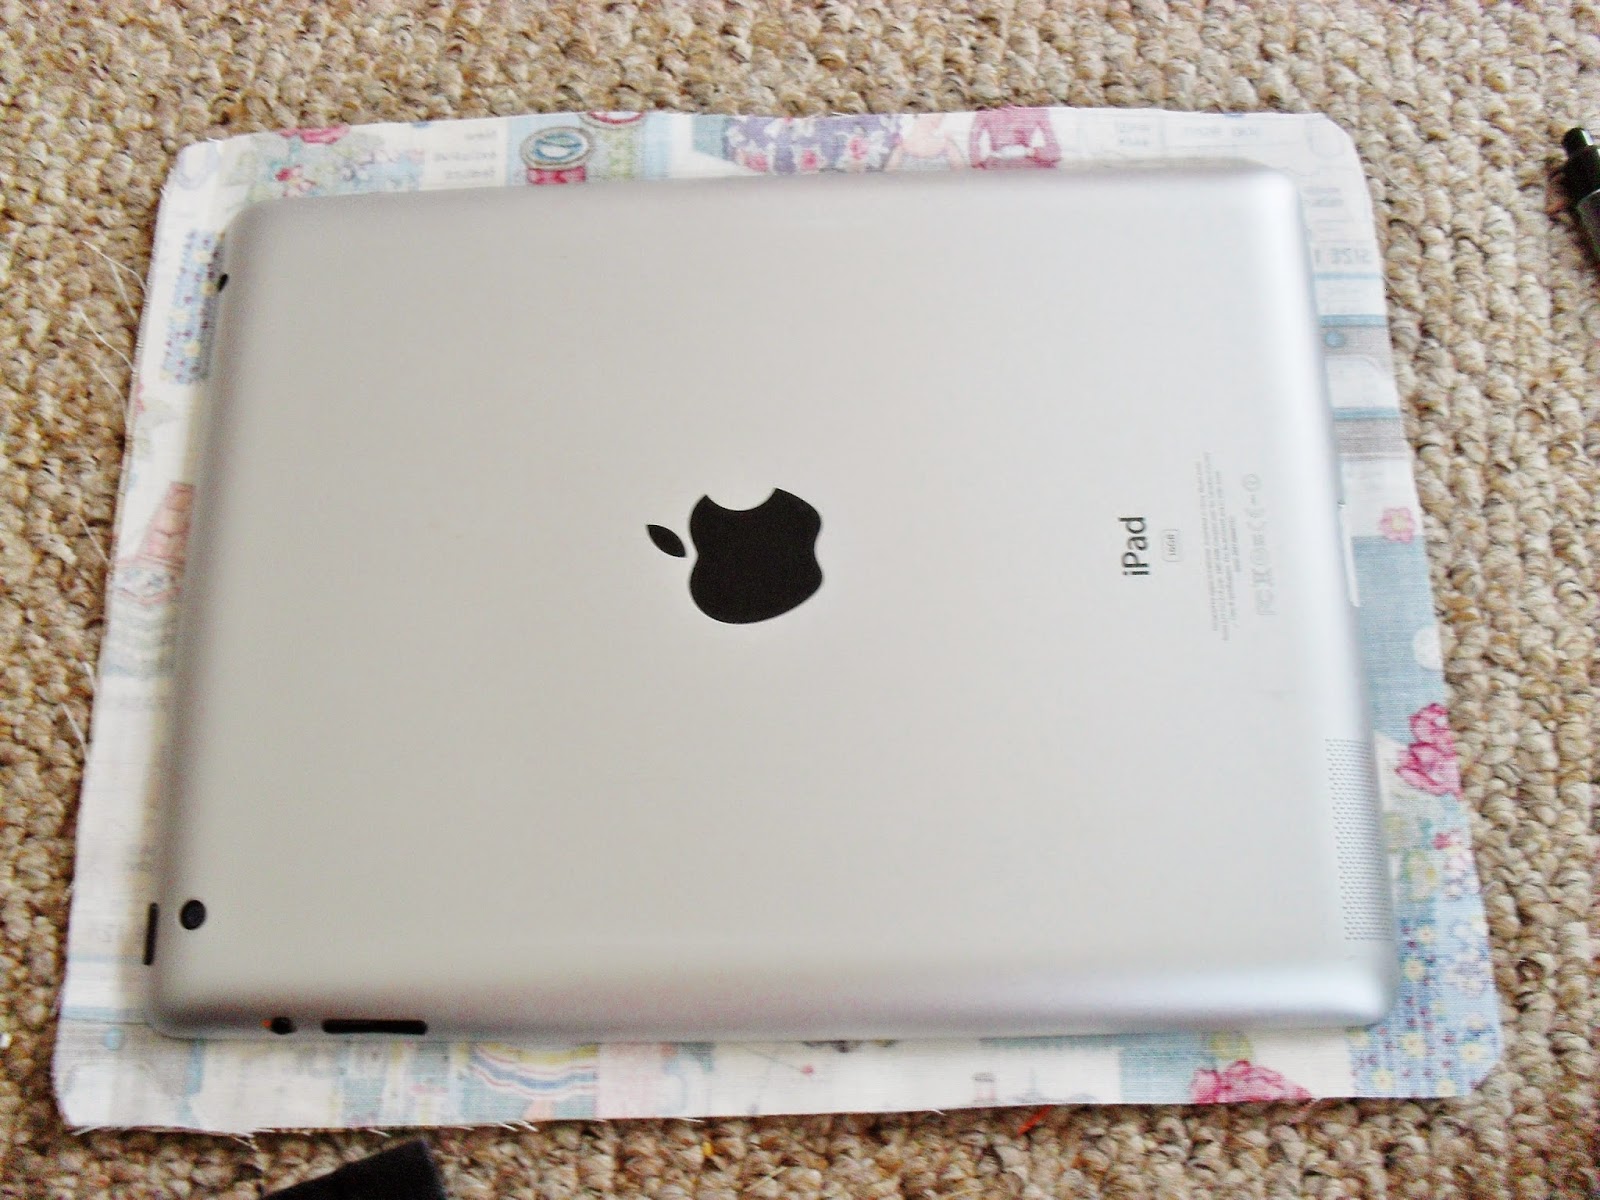
Book for easy sizing of bag, Molly makes Magazine and Ipad or similar size, used for this one x
An Iron


As Pictured Below, you should have a nice neat outline.

Step 3: On top of your already sketched line add an additional 1.5cm minimum all around the edge this will be your seam allowance and then cut neatly the outside. It will look something like this when your finished.
Step 4: Lay your pieces out with patterns facing towards one another. Pin and Get Ready for stitching.

Step 5: Place your fabric under your sewing machine and using a straight stitch, follow the line you sketched around the edge but make sure you leave a 2cm minimum gap between where you start and finish this will allow you pull your fabric inside out. Oh and don't forget your locking stitches to secure your stitching. :)

Step 6: You will then Pull the fabric Inside and out, the same way you do a cushion and slip stitch the 2cm gap and it should look something like this. In need of a good ironing though x First part completed! This will be your lid!

Step 7: We are now to make both the front and the back panel of the bag. Using an item slightly bigger than your Ipad, you want your measurements for the bag to be at least a 1cm bigger than your ipad measurements and this applies to all round your item. I happen to have a Molly Makes Magazine which fits very nicely with my Ipad sized bag flap. Once you have finished with your measurements you repeats Step 2 - 6 again, you do this for both the front and the back panel.

Step 8: Sorry About The Blurry Picture Here! It's hard taking a picture with one hand! Next You need to measure the sides of the bag. So measure the left Side (20cm) Bottom (30cm) and right side (20cm) these are my measurements yours may be slightly different depending on what you use. The total I had was 70cm and I added 5cms for the seam allowance and extra room just In case you need it.

Step 9: Using the measurements of your bag mentioned in step 8 Cut 2 Long Strips measuring approximately 2-3inches in width (If you want it wider, just add extra width) . In my case both strips measure 75cms long.
In the same way you did the front, back and lid panel in step 2-6 you will do the same for these long strips keep your sewing foot sat along the edge of your strips as you sew, this will give you good equal distance all the way round. Make sure your patterns are back to back and stitch all the way around leaving a 2cm gap again. Then pull your fabric inside out till it's all come through. Slightly fiddly as it's long and thin.
You do the same again for the Strap by repeating the above steps, the only difference is making the length longer I used a full width of fabric 110cm's. If you want your strap to be longer adjust the length according to how you want the bag to sit on your body.

Step 10: You should have 5 pieces, 1 Bag Flap, 1 Front and 1 Back Panel, 1 Strap and 1 Centre Support. I think these all need a good Iron Don't you?

Step 11: Wallaa! They've been ironed! and they look so much better The next part is a little bit fiddly. I left the strap out of this picture but it is their, promise.

Step 12: Using the 70cm Centre Support Piece and One of the Front or Back Panels your going to pin as closely to the edge as possible (as pictured), grip with your finger/thumb a long the seam and pin with your other hand. This will be were you sew as close to the edge as you can get.

It will hopefully look like this! Your going to sew exactly where you have pinned and as near to the edge as possible.

Step 13: You may have excess Centre, so heres what to do. Bend it over and Stitch a nice straight line. Don't forget to back stitch to secure. This is a great way to use Bag Hoops if you want to make it extendable but we are doing a very basic version for your convenience. You may need to adjust your tension setting to around 0-1 as the fabric is now quite thick, do this for the other side of the Centre support as well. Try to make they sure they are evenly lengthened and matched on both sides.

Step 14: Stitch along your pinned seam (from step 12), as close to the edge as possible and make sure underneath your bag is nice and straight. Stitch all the way to the bottom and lock in your stitches when you are their. When your approaching a corner get all the way to the end of your straight stitch and as your about to turn, place the needle down into the fabric, lift your foot and then turn your stitching, this covers any gaps in corners etc, it's a good idea to keep your stitching as neat and unclumped as possible as this stitching will be on view. Don't forget you may need a tension setting of 1-2 and make sure you do a Back Stitch at least twice when you get to the end of each line of straight stitch. Go all the way to the end of your line and do a double back stitch, repeat the turning instructions for the last corner, place needle down, release the foot and turn your fabric. Again making sure it's straight and stitch all the way to the end. Secure your stitching with a back stitch and you've finished this step.

Step 15: It should look something like this, this is the inside of the bag.


Step 16: Before We do anything else. We are going to attach the bag flap. Make sure your pattern sits the right way up. Pin the flap on to the back of your bag, as pictured.

Step 17: Secure the Bag Flap with stitching, I ran my sewing machine over this 3 times to give it extra strength, I am not lucky enough to own an industrial strength sewing machine. ;)

Step 18: Attaching the Straps, pin in place. This is really important, when your sewing your straps on. Stitch a full Rectangle/Square were you want you want your bag strap to join and on both sides stitch horizontally and vertically through your stitching, it will look like an X. This gives the bag good strength, to carry all kinds of heavy items without the fear of your bag falling to pieces. Stitch The straps on both sides in the same manner try to make sure they sit equally.

Step 19: The final part is repeating steps 12 and 13 for the front panel. Be very careful when your stitching not to catch underneath as you secure the front, I don't think you want to be unpicking uneccessarily. This is your bag now finished. Feel free to embellish with all sorts of lovely goodies

Admire your work :)


All this beauty needs is button holes and embellishments! Not me! the bag. Share your bag makes with me and give me your best pose ;) I know I look like a Blue Peter Presenter in mine apparently! :) you can email your pictures to and we will place you on my wall of fame followers soon to be introduced email me at patchworkparadise@gmail.com or visiting me on facebook.

Subscribe to:
Posts (Atom)